Navigating with a Trail Router route
A common question I receive is "How can I run with a route I've created on Trail Router?"
Some people have GPS watches, and will be familiar with exporting GPX files, loading them onto their watches, and then having their watch show them when to turn. Trail Router has such users well catered for - you can download any route as a GPX or KML file.
But many people don't have GPS watches. Luckily, we've considered them too. In fact, we have two options for them.
Turn-by-turn navigation in Trail Router
The Trail Router Android app and iOS app offer turn-by-turn navigation. This means it will tell you when to turn, both visually on the map, and also with a voice instruction. It's like when you drive with Google Maps, except whilst running.
To use this, create a route and then simply click "Run".
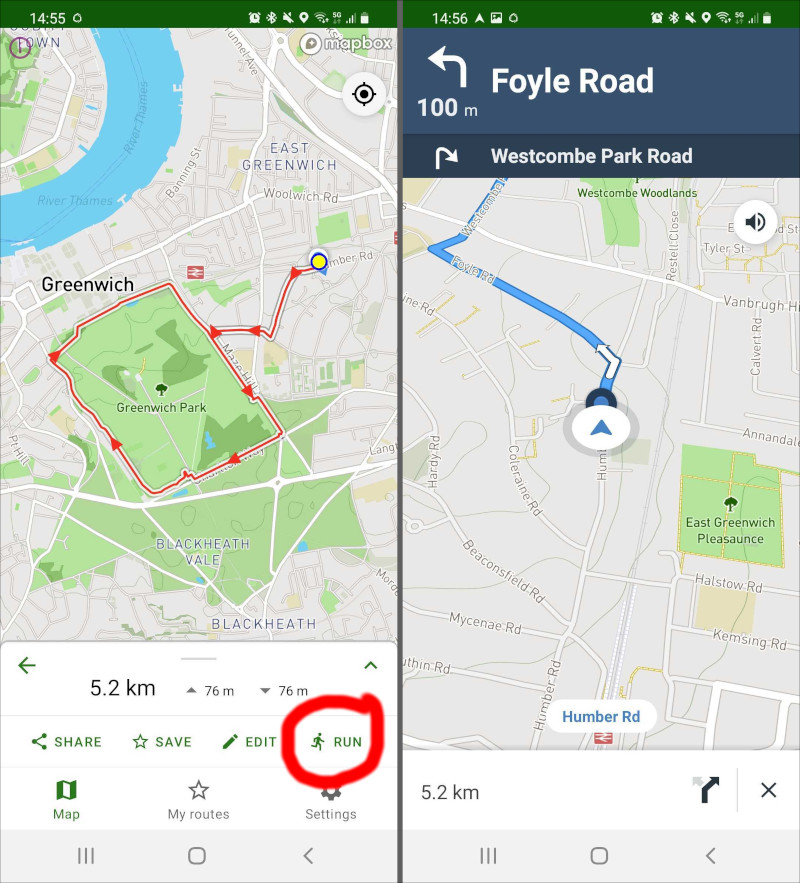 To start turn-by-turn navigation for a route, simply click 'Run' when you've created your route (shown left). Turn-by-turn navigation will then begin (shown right).
The navigation will start from the closest point on the route to your current location. So if you close the app part way through a run and then restart navigation later, it will pick up where it left off.
It will also read out turn instructions to you, and do so in your local language.
If you go off-route and have mobile reception, Trail Router will automatically re-route you to get you back on course for your next waypoint.
The turn-by-turn navigation UI is powered by the Mapbox Navigation SDK. We are very grateful for Mapbox's continued support of Trail Router.
Fallback navigation
The turn-by-turn navigation is great, but it does have a few pitfalls.
Firstly, it needs internet access. This is fine in a town or city, but it's not so great if you want to start a route in a rural area, or if you accidentally close the app and want to restart it and you realise you have no signal.
Secondly: unlike roads, many trails and footpaths don't have names. In these cases, the voice instructions from the turn-by-turn navigation aren't that useful - it will just say things like "Turn left in 200 metres". This can get a bit confusing when you're in an area with many interconnecting paths. In these cases, you might prefer to just track it yourself manually.
For these reasons, Trail Router provides a fallback navigation mode. The fallback navigation mode does the following:
- Puts the map full screen, with your route displayed.
- Tracks your location as you move around.
- Locks the screen to prevent rogue screen presses. You can swipe a bar at the bottom to unlock it.
- Keeps the screen always on.
- Allows you to still zoom in and out, but nothing else.
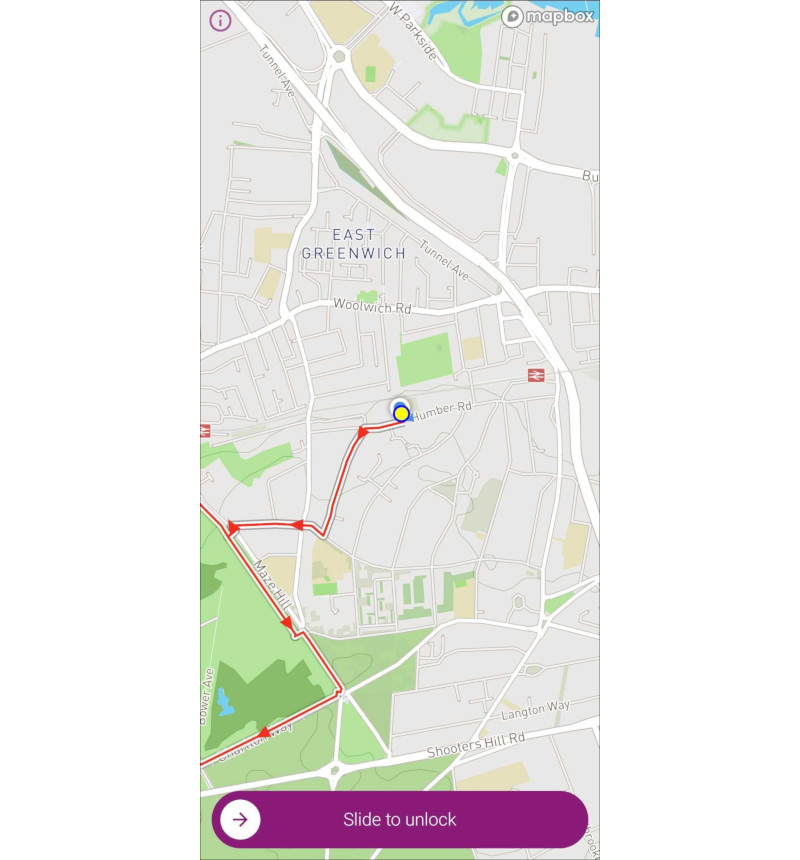 The fallback navigation mode locks the screen and follows you on your route. But it does not provide turn-by-turn instructions.
Users can forcibly enable this mode for all navigation by going to Settings and unchecking "Use turn-by-turn navigation". If you don't do this, then the fallback mode will be used whenever you're offline.
Loading Trail Router GPX files into other navigation apps
Of course, if you don't like the above, then you can export a route generated by Trail Router as a GPX file. There are dozens of Android and iOS apps that can load GPX files and display your location relative to a route. My personal favourite (for its simplicity and offline support) is GPX Viewer, but I hear good things about OsmAnd too.